Slice Forms and 3-D Prisms
Project Info and Reflection
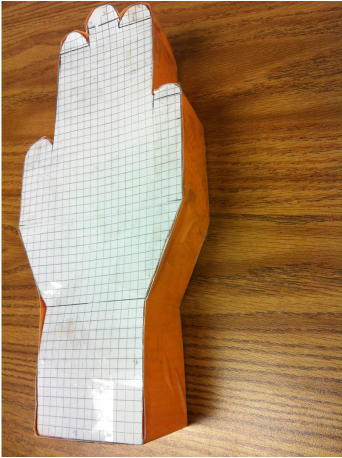
My 3-D hand prism
|
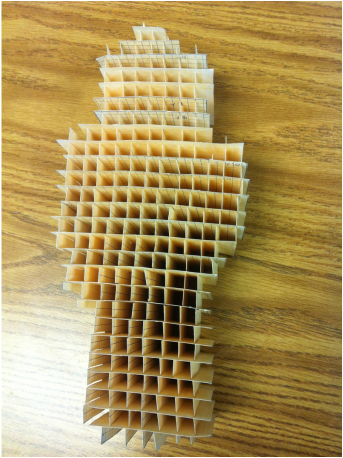
My 3-D slice form
|
What geometry concepts did you learn from this project?
The ability to look at a shape and imagine it in 3-D is the most interesting and fun thing that I experienced and learned during this project. I learned the concepts of base net, lateral surface area, total area, and perimeter. These concepts involved circles, triangles, rhombuses, rectangles, and squares. These concepts are incorporated into the 3-D sliceform and prism through the fact that we had to find the base net area, lateral surface area, total surface area, and perimeter of the whole entire 3-D prism hand to make the slice form. To find all of these things we had to divide our prism into different shapes. For me, this included rhombuses, half-circles, rectangles, and squares.
What did you like about this project and what challenged you?
I combined these two questions together because I feel that the thing I enjoyed the most about this project is also the thing that challenged me the most. The process of creating and constructing the slice form was very tedious and difficult. It did not involve a lot of intelligence, yet there was a sort of craftsmanship about it that I enjoyed a lot. Cutting out every little slot and every rectangle was time-consuming, but it was very soothing. While constructing it I got frustrated fairly often, but I knew that if I persevered and kept on trying I would eventually be able succeed at finishing it. When I finally did finish it, it was something that I was highly proud of, and I decided that it turned out fairly well. So in the end, all the time spent at trying to make it look good and be constructed correctly paid off.
What did I learn about myself during this project?
Mostly this gave me the confidence and the reassurance that I had the perseverance to finish other projects like this one on time and with obvious evidence of refinement. I really tried to start early and work hard at not getting behind at this project, and I succeeded at finishing by the due date. Discovering and reconfirming that I could do that helped me feel better about other future projects that may be similar. The patience that was needed to really appreciate this project was, I feel, difficult for some students to find while they were doing it. So another thing I learned about myself during this project was that pocket of extreme patience that also comes with determination. And how if I'm able to trigger one of them ,(determination, or patience), the other will follow.
Bugs on a Coordinate Plane
Below are two representations on how to solve for bugs on a coordinate plain.
Example 1I have been observing the motion of a bug that is crawling on my graph paper. When I started watching, it was at the point (1,2). Ten seconds later it was at (3,5). Another ten seconds later it was at (5,8). After another ten seconds in was at (7,11).
a) Draw a picture that illustrates what is happening. b) Write a description of any pattern you notice. What assumptions are you making? c) Where was the bug 25 seconds after I started watching it? d) Where was the bug 26 seconds after I started watching it? a. (See picture below)
b. The bug is going along a slope of two right and three up, every 10 sec. To find the points, you add 2 to the x point. I am making the assumption that the bug moves 4 units every 10 seconds. c. The bug is at the midpoint between (5,8) and (7,11), which is (6, 9.5), after 25 seconds. d. The bug is at (6.2, 9.8) after 26 seconds. 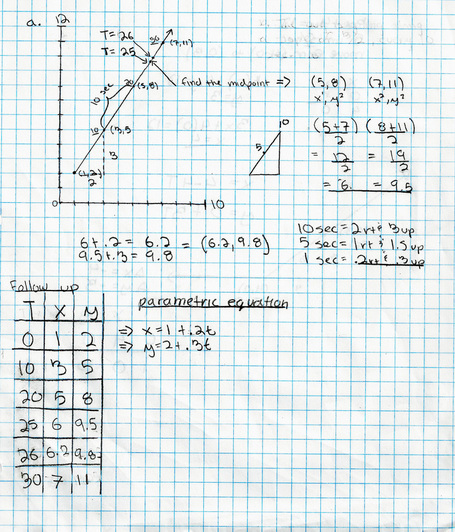
|
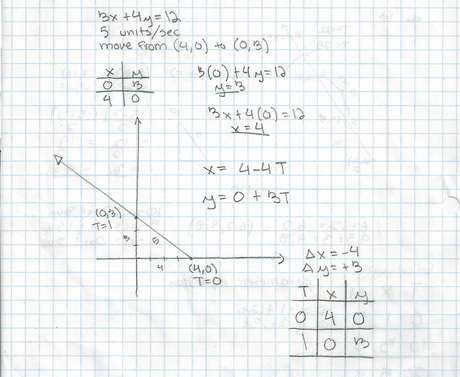
Example 2Find parametric equations to describe the line 3x + 4y = 12. Use your equations to find coordinates for the point that is three-fifths of the way from (4,0) to (0,3). By calculating some distances, verify that you have the correct point.
|
Rotations and Reflections
Below are examples of lines of reflection, centers and angles of rotation, double reflections in parallel lines, and double reflections in intersecting lines.
Lines of ReflectionGiven a pre-image and its reflecting image, how would I find the line of reflection? Lines of reflection could be represented as a mirror that is between two identical reflected shapes, (as shown below). You first need to locate corresponding points on the image and the pre-image, so we'll use point A and point A'. Connect A and A prime with a line segment. Then find the midpoint on the line segment. Do this with another pair of corresponding points. Below I will use point and B' prime. Connect these two midpoints with a line using a ruler. You will then discover you have found the line of reflection.
|
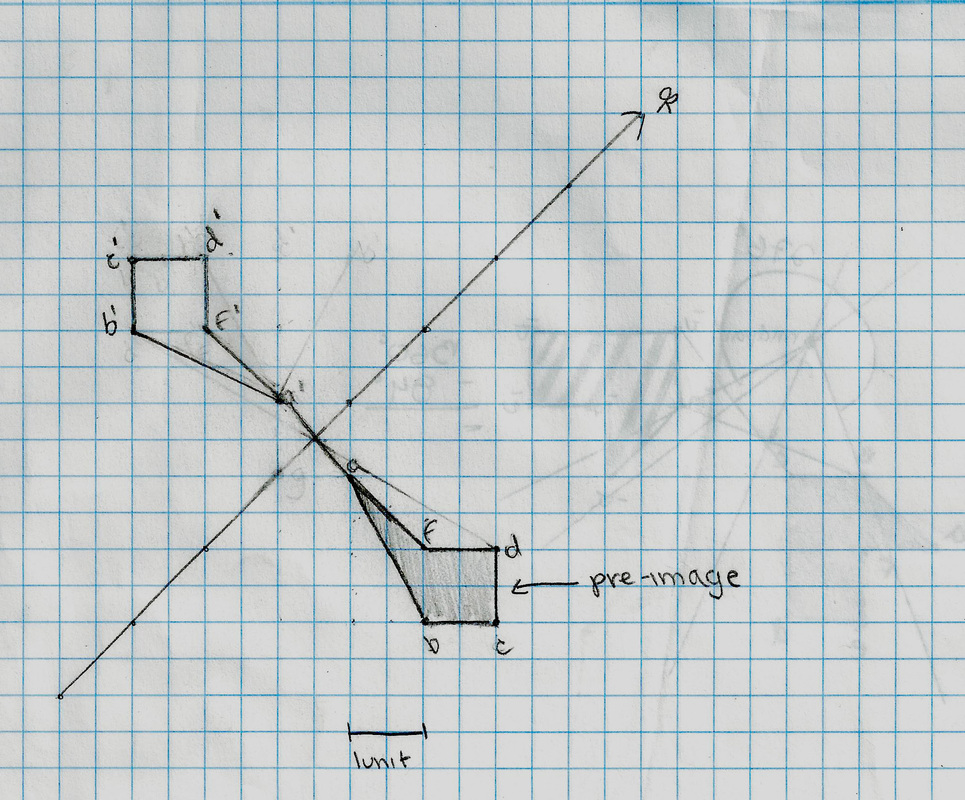
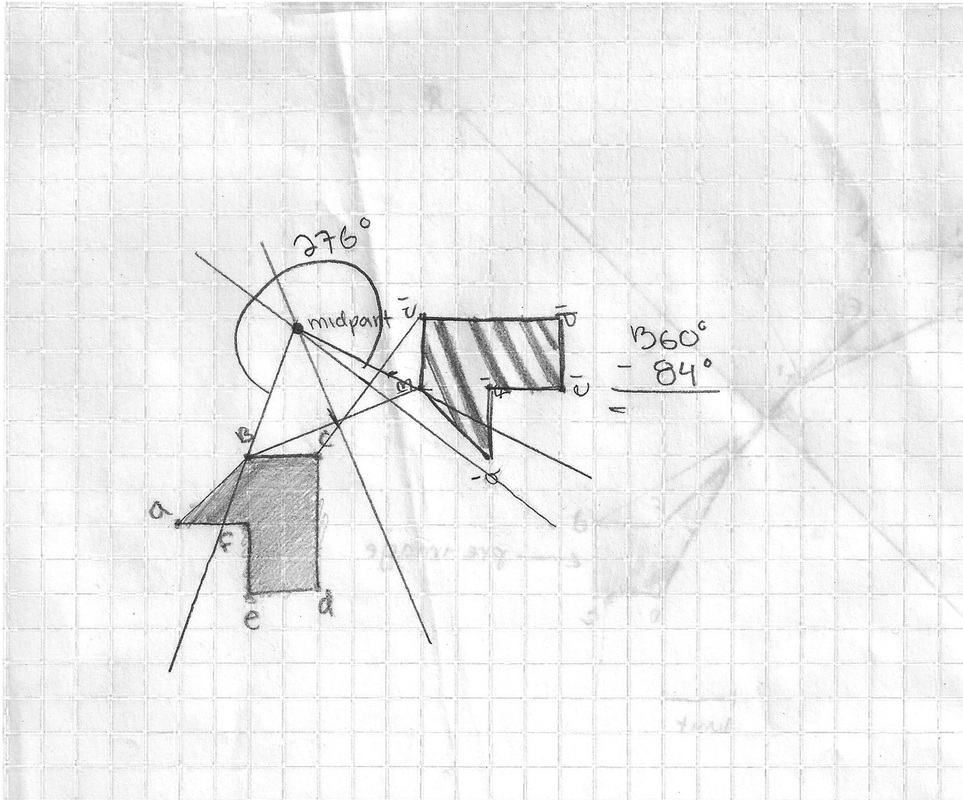
Centers and Angles of RotationTo find the center of rotation, you must find two corresponding points, (for example A and A'B). This is shown in the image below. Create a line segment between A and A'. You must then find the perpendicular bisector of this line segment. For this you must find the midpoint of the line segment, and place your ruler perpendicular to the segment through the midpoint and create a line. Repeat this process with two other corresponding points. Where the two separate perpendicular bisectors meet is where you will find your center of rotation. To create the angle that you need to measure, draw two rays connecting to two corresponding points from the center of rotation. To find the angle of the rotation, you must then measure from one ray to the other. Depending on what angle you are looking for, you will either end up with it exactly or need to subtract is from 360.
|
